Incidents are a valuable feature that allows you to collect Events to indicate specific occurrences. They play a vital role in helping us understand the narrative behind complex situations by enabling us to track and analyze associated Events effectively.
Creating an Incident
To create a new Incident, follow these simple steps.
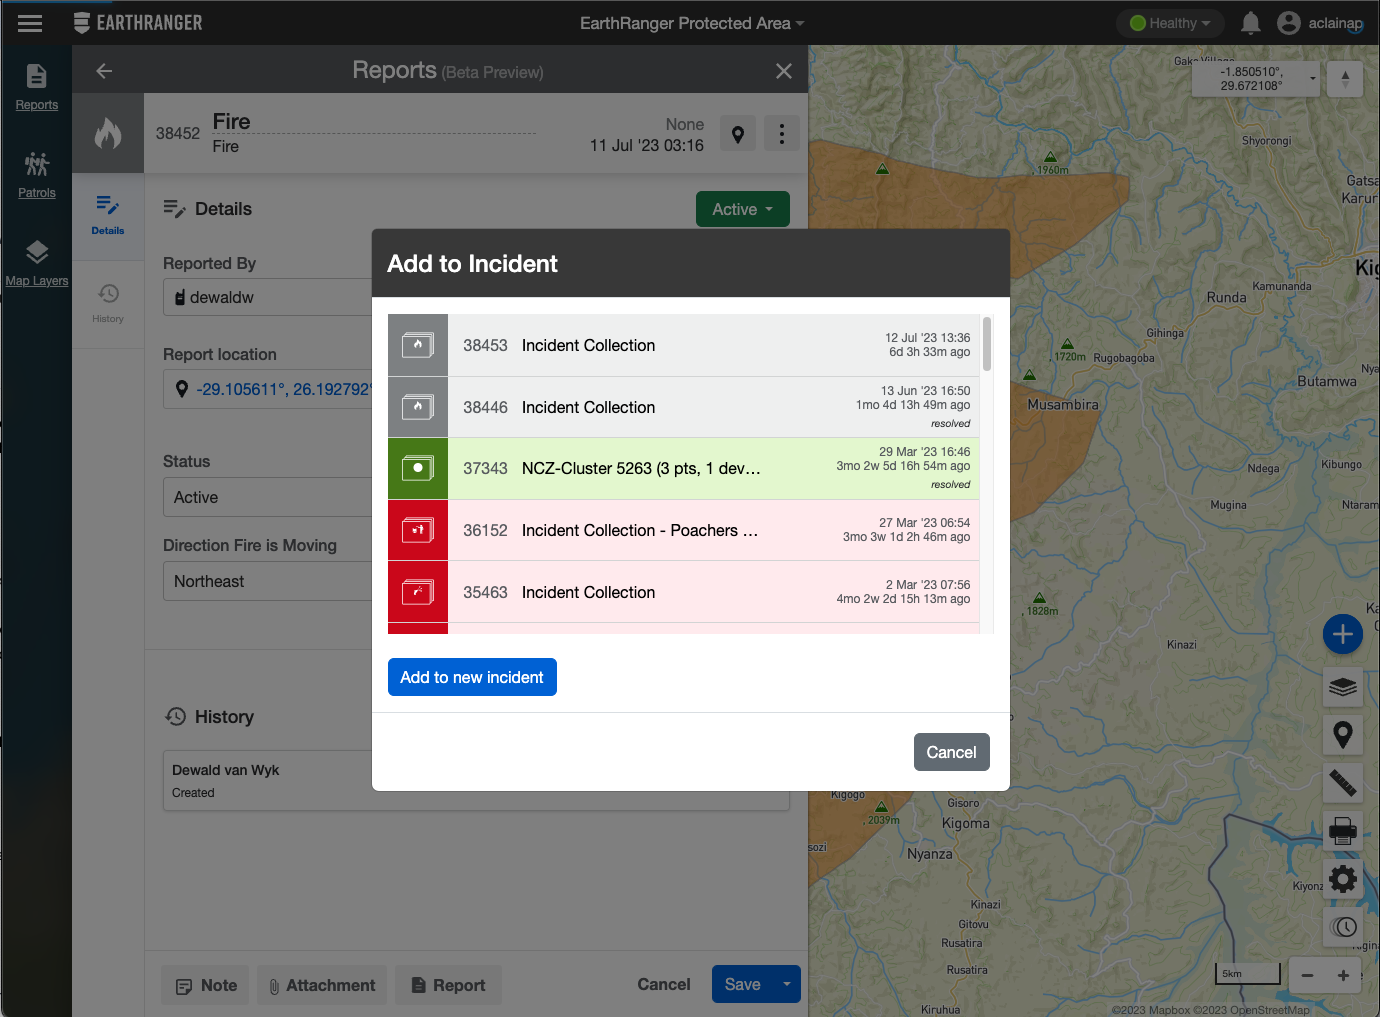
When creating a new Event, locate the three dots next to the title and click on "Add to Incident." A list of existing incidents will be displayed, giving you the option to select a previously created Incident to which you want to add the Event. Alternatively, you can create a new Incident by clicking on "Add New."

You can also add previously created Events by following the same steps and adding them to the Incident you just created.
Once an Incident is created, it will appear as an Incident Collection in the Events feed, displaying the date and time of its creation.
Customizing Incident Names
By default, a recently created Incident is labeled as "Incident." However, you can easily personalize the name by clicking on the Incident's name and editing it accordingly.

Managing Incident Details
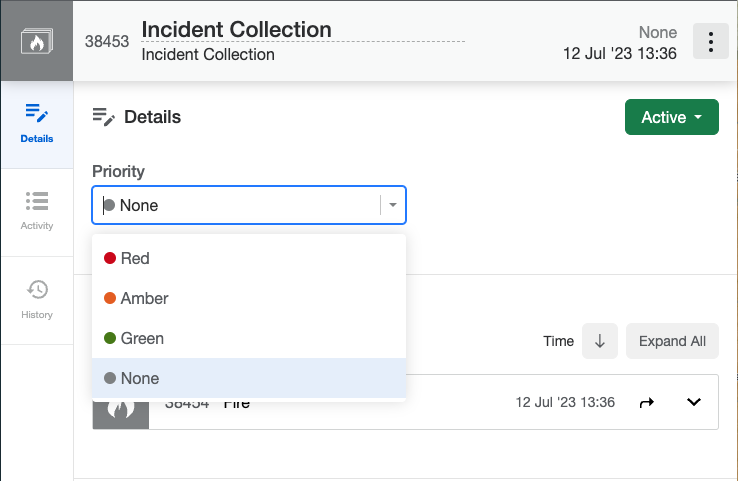
In the Details section, you will find the priority assigned to the Incident. You can view and adjust the priority as needed. You can also Resolve an Incident by clicking on the status button on the Incident Details.

Exploring Incident Activity
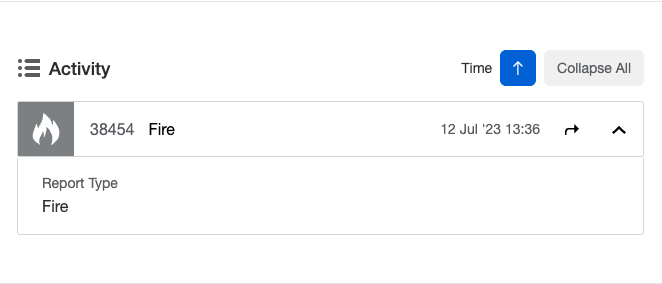
The Activity section allows you to preview the Events attached to the Incident. To view the details of each Event without opening them in another window, simply click on "Expand All."

This feature saves you time and effort while providing a comprehensive overview.
Incidents: Enhancing Decision-Making
Incidents greatly contribute to our understanding of data operations and empower us to make informed decisions, all within a single, convenient location.
By following these steps, you can effectively utilize the Incidents feature to streamline your workflow and gain valuable insights.
