EarthRanger offers several ways to export observation-level data, depending on your needs and tools. This article outlines four export methods, from manual CSV downloads to automated ArcGIS integrations.
Option 1: Use the EcoScope Downloader (Recommended)
The EcoScope Data Downloader allows you to export observations from a subject group in bulk. This is the most efficient method for large-scale data analysis.
Steps:
-
Download the EcoScope Downloader
Install the tool following OS-specific instructions. -
Export Subject Tracks
Export to CSV or GeoPackage formats.
The export includes all subjects in the group.
Asubject_namecolumn helps you filter individual subjects afterward. -
Post-Processing
Files are compatible with QGIS, ArcGIS, and other GIS tools.
For detailed guidance, see: How to Use the Ecoscope Downloader.
Option 2: Export Observations via Admin Site
You can manually export filtered observations from the Admin interface:
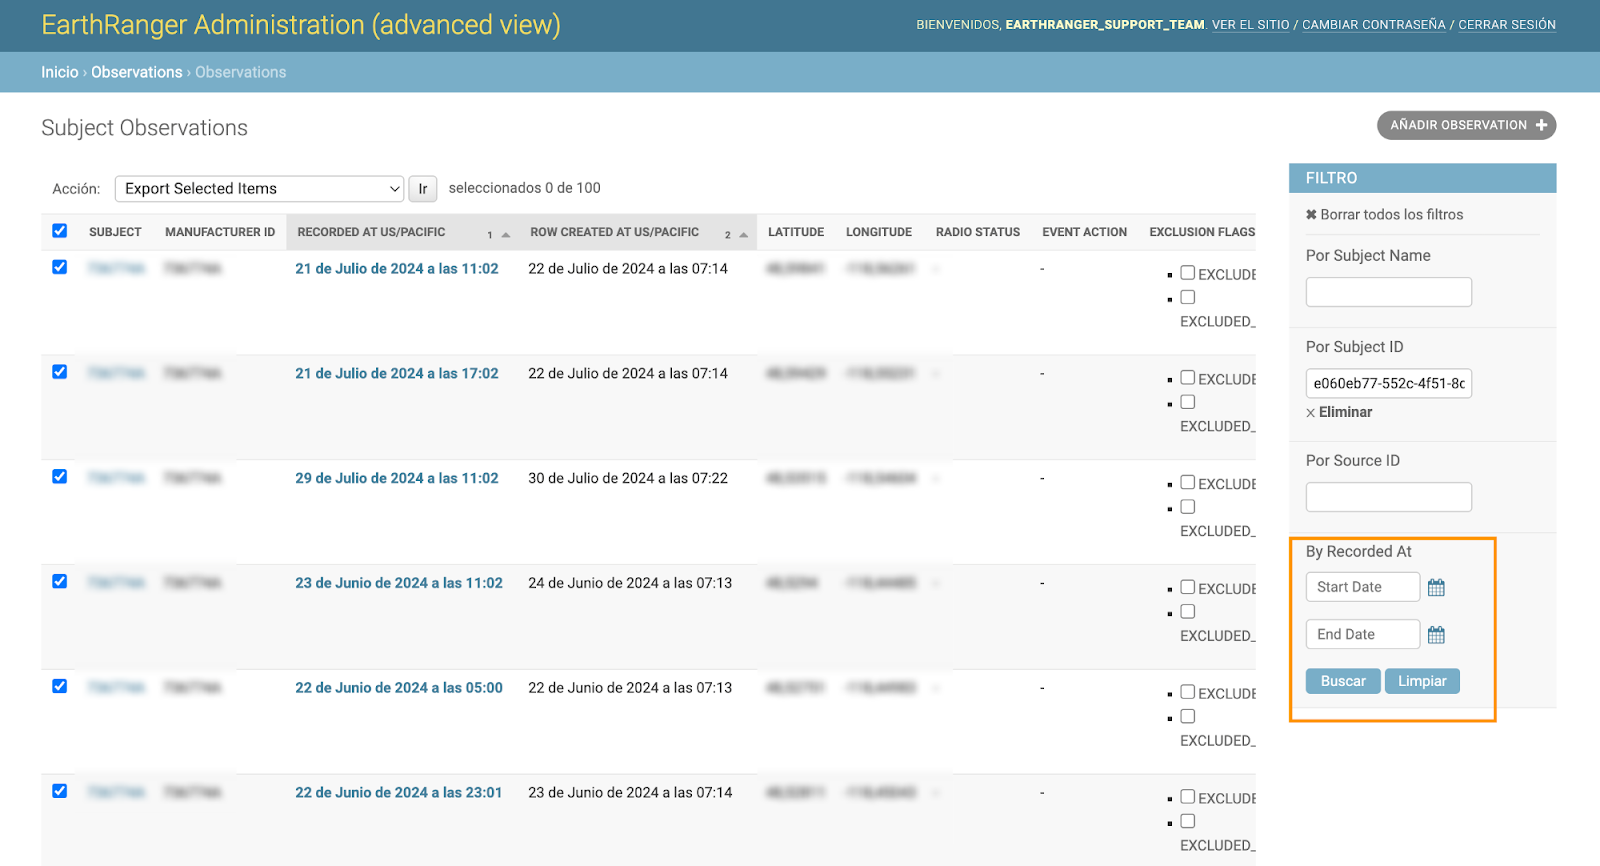
Steps:
-
Log In to Admin: Go to
Observations > Observations. - Apply Filters: Filter by time range or other metadata.
-
Export to CSV: Click to download the filtered list as a
.csv.
For more information around Observation CSV export on specific subjects please visit: Exporting Subject Tracks.
Optional: Split Latitude and Longitude in Google Sheets
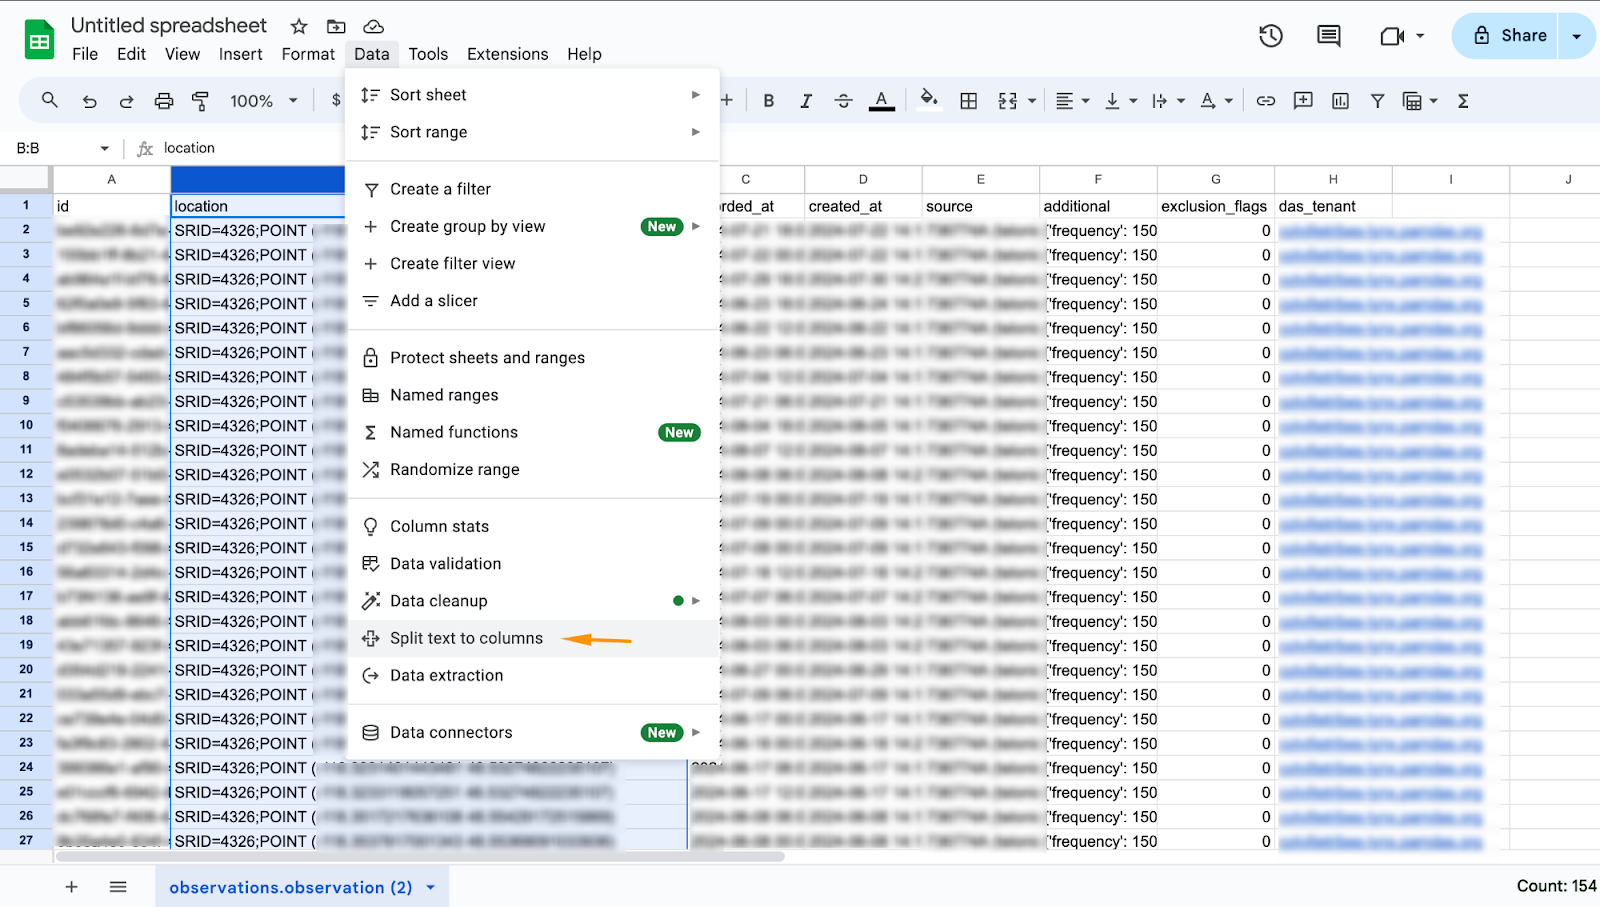
-
Open the CSV File
- Import the file into Google Sheets.
-
Select the Location Column
- Highlight the column containing combined coordinates.
-
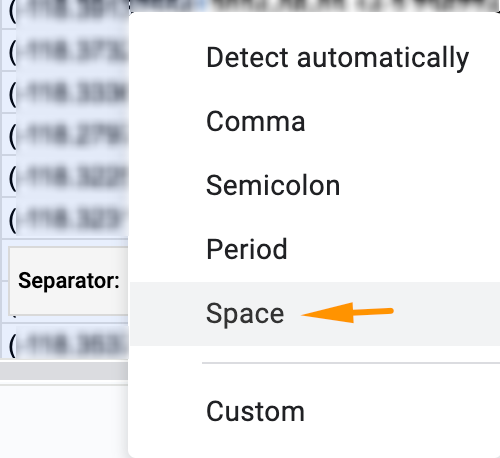
Split Text to Columns
- Go to Data > Split text to columns.
- Choose Space as the separator.
-
Rename and Clean Columns
- Rename the new columns as Latitude and Longitude.
- Remove parentheses by using Find and Replace:
- Replace ( and ) with nothing.
- Replace ( and ) with nothing.
-
Save the File
- Save the updated sheet as a CSV file for further use, such as importing into ArcGIS.
Option 3: Sync to ArcGIS Online
For users with an ArcGIS Online account, EarthRanger offers a direct integration to synchronize subject tracks automatically.
-
Set Up the Integration
- Contact support to implement the integration.
- Synchronize Data
- Subject tracks from EarthRanger will sync directly to your ArcGIS Online account.
For more details, see EarthRanger to ArcGIS Synchronization.
Option 4: Exporting from the Menu
The EarthRanger Web interface also allows basic observation exports through the sidebar menu.
For details, see: Exporting Data from EarthRanger Web
Important Notes about Exporting Data
- This export includes only the Collar_ID (Device Manufacturer ID), not the subject name.
- To match observations with subjects, you must also export the Subject Summary and use Excel's VLOOKUP to cross-reference the Subject Name with the Collar_ID.
Summary
| Export Method | Best For | Subject Filtering | GIS-Ready |
|---|---|---|---|
| EcoScope Downloader | Bulk, multi-subject export | After download | ✅ |
| Admin Site CSV | Custom filters, small exports | Directly | ✅ |
| ArcGIS Sync | Automated GIS pipeline | Account-based | ✅ |
| Web Menu | Quick exports | Manual only | ❌ |
For help choosing the best method or setting up integrations, please contact EarthRanger Support.